
Haircut & Style- The Middle Part
The Middle Part Hairstyle
This has got to be one of the more controversial hairstyles in recent years, especially since a whole generation declared it to be the best way to style your hair, and went on to bash millennials for still rocking side parts that “didn't flatter anyone's face” [1]. The middle part is very popular with Gen Z folk because it doesn't skew the forehead and can be done at almost any length of hair (obviously not for really short hair but if the hair can fall onto the forehead, then you may be able to pull off the look).
Maybe it's because I'm a millennial myself, or maybe because I have a widow's peak, but I never thought the middle part was for me. I have had many clients who have given it a good try, but ultimately, looked a bit out of place. Though I may never be accepted by the younger, cooler kids, that doesn't mean the same for you! If you're thinking of trying out the middle part hairstyle, then there will be a few things for you to consider so that you don't end up looking like a hair-sniffing villain.
What to Ask for?
Simple Answer:
"Middle-part curtains long enough to reach eyebrows, back and sides cut to maintain a bit of flow, but not too long."
Long Answer:
There are several ways to customize this haircut to your liking, and you can get something that suits your style. The focal point of this hairstyle is the middle part, but what that means in terms of corresponding lengths can vary from person to person.
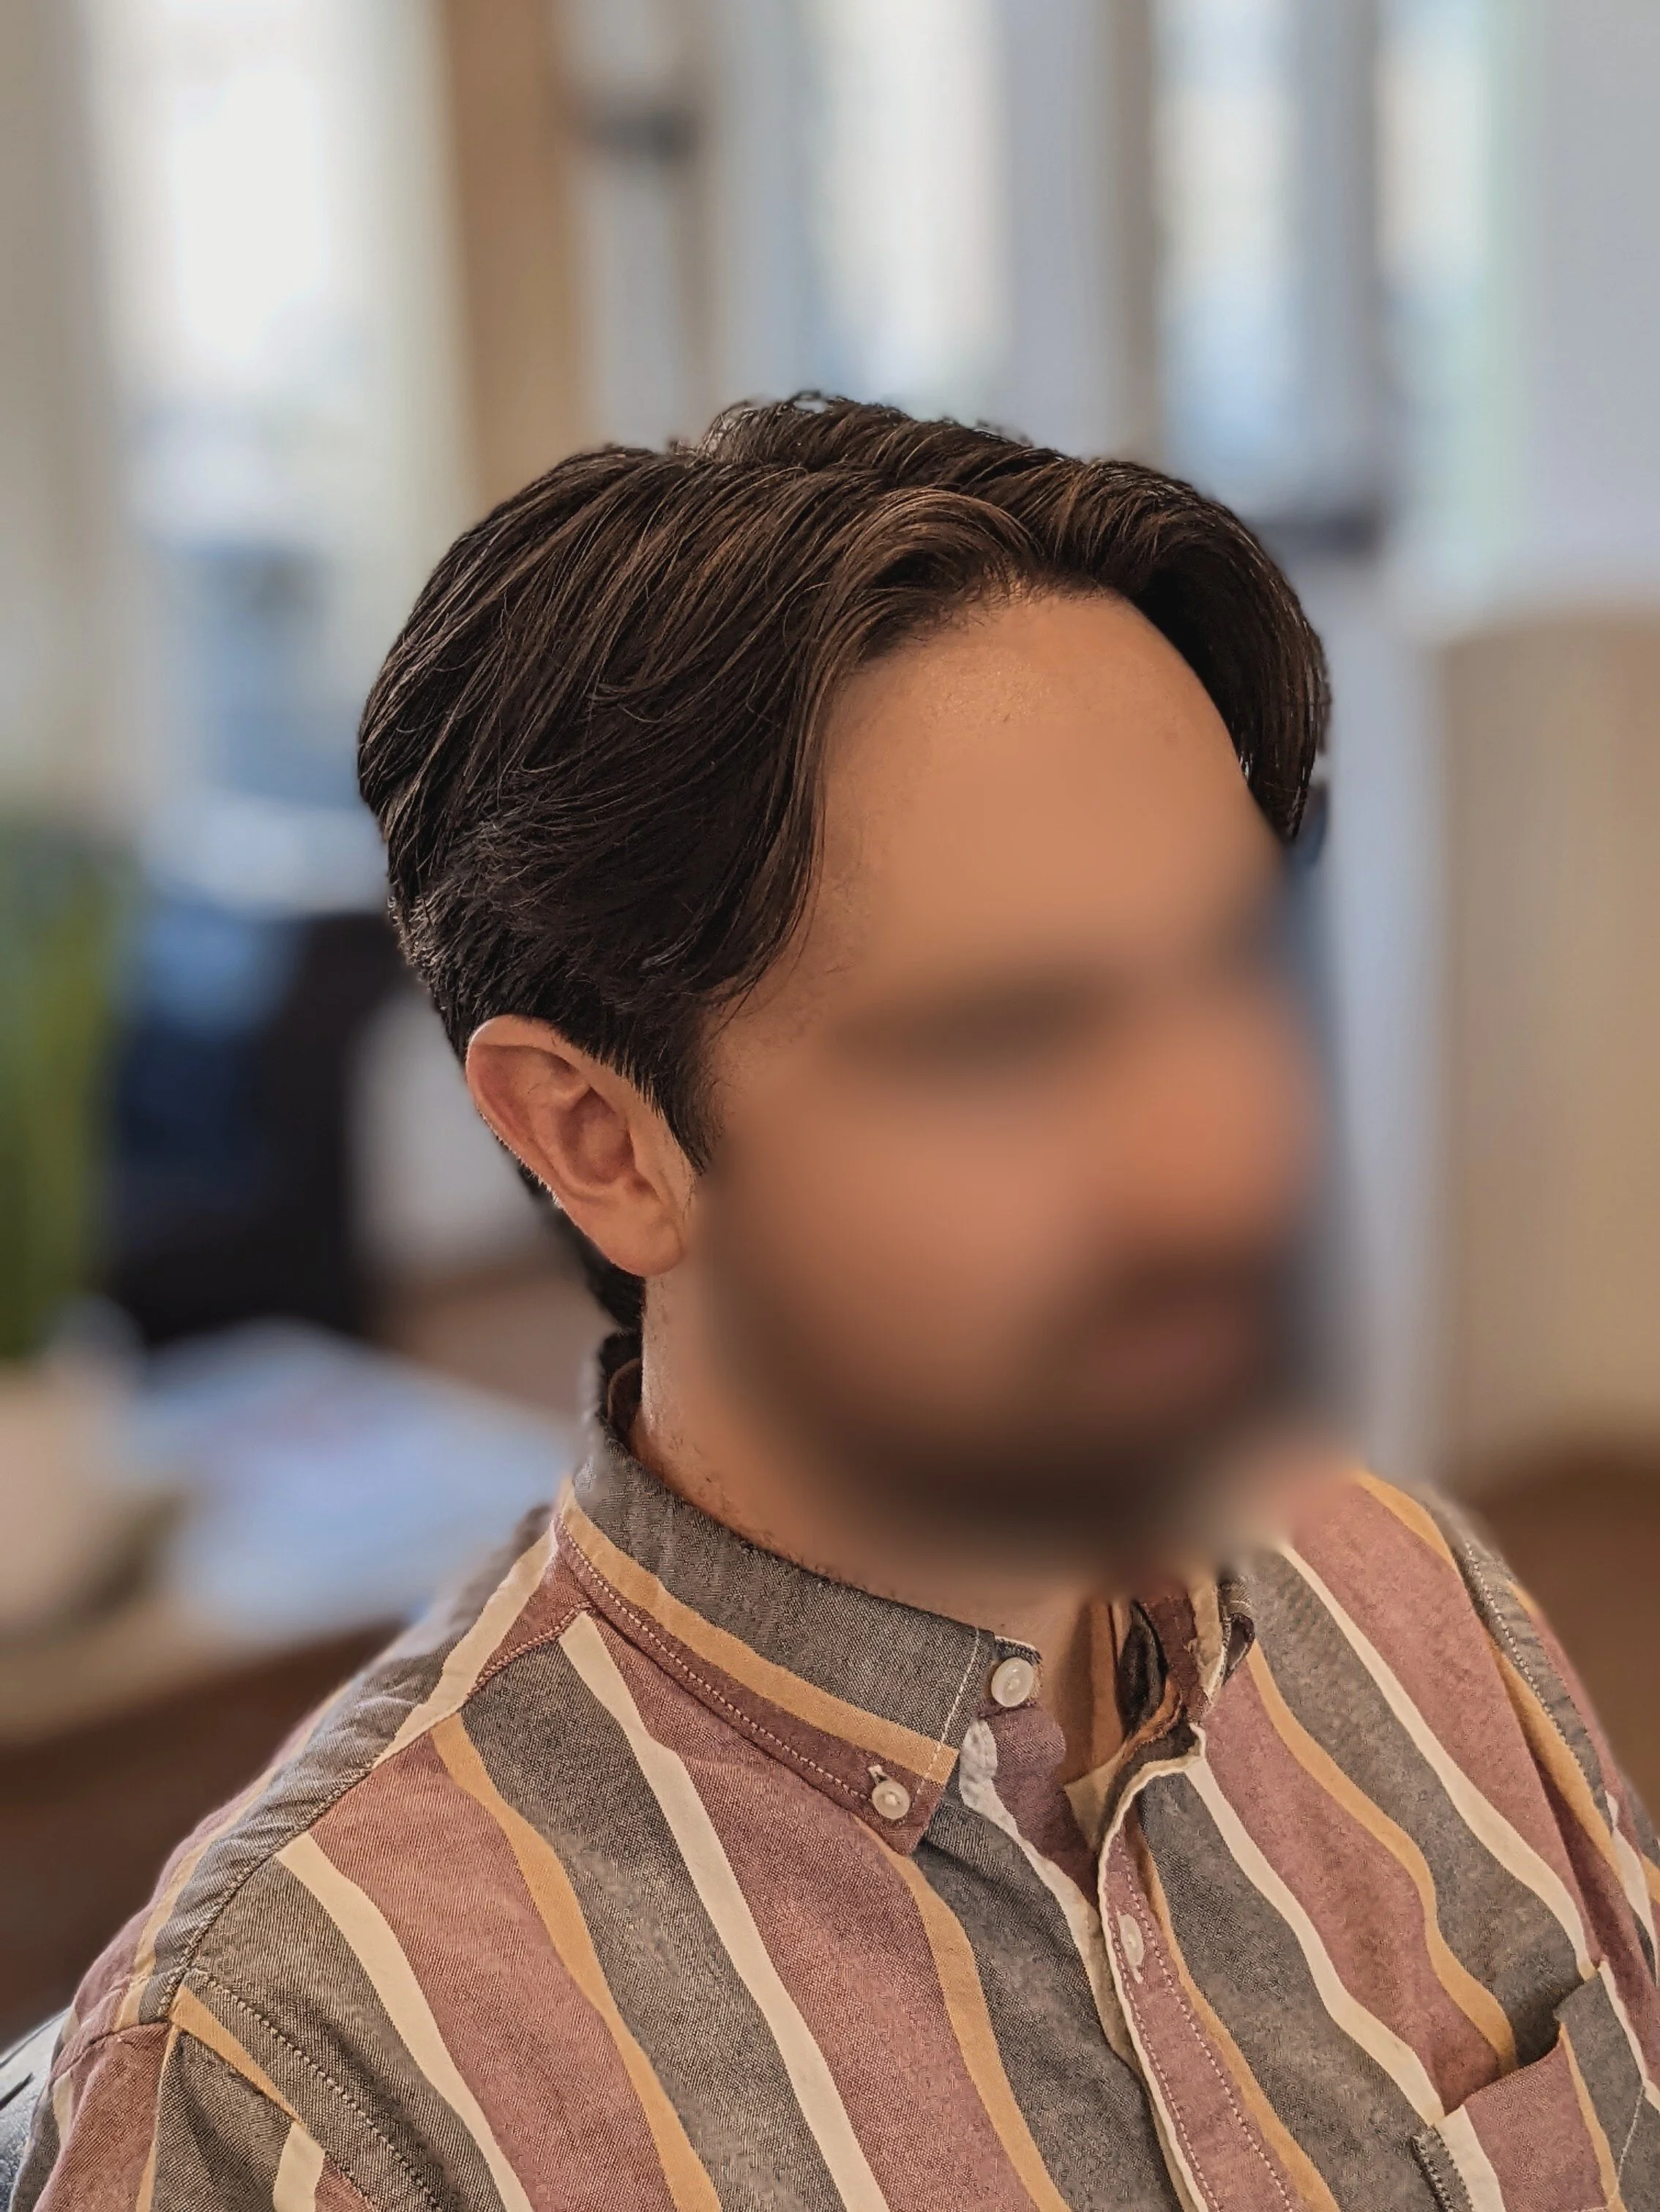
Ideally, you want the top to be long enough so that there is a bit of overhang as to frame the forehead. You also want the hair in the front to be long enough so that it can be styled with a bit of volume at the root and for it to then fall down into an s-wave pattern. This will give the signature "m" shape on the very front hairline, and you want that bit of volume, or else the mid-part will look too flat (again like a hair-sniffing villain).
Now, how long does the hair have to be exactly to get to that point?
That will depend on your hair type, which is the overall texture pattern of your hair. But for most people, you can usually start styling into a middle part when the front of your hair reaches the tip of your nose when gently pulled down. It is a deceptive style, because it may not seem like your hair needs to be long to pull it off, but unfortunately, it does. If you’re planning to grow your hair longer for this style, make sure you don’t make the one common mistake I wrote about last week.
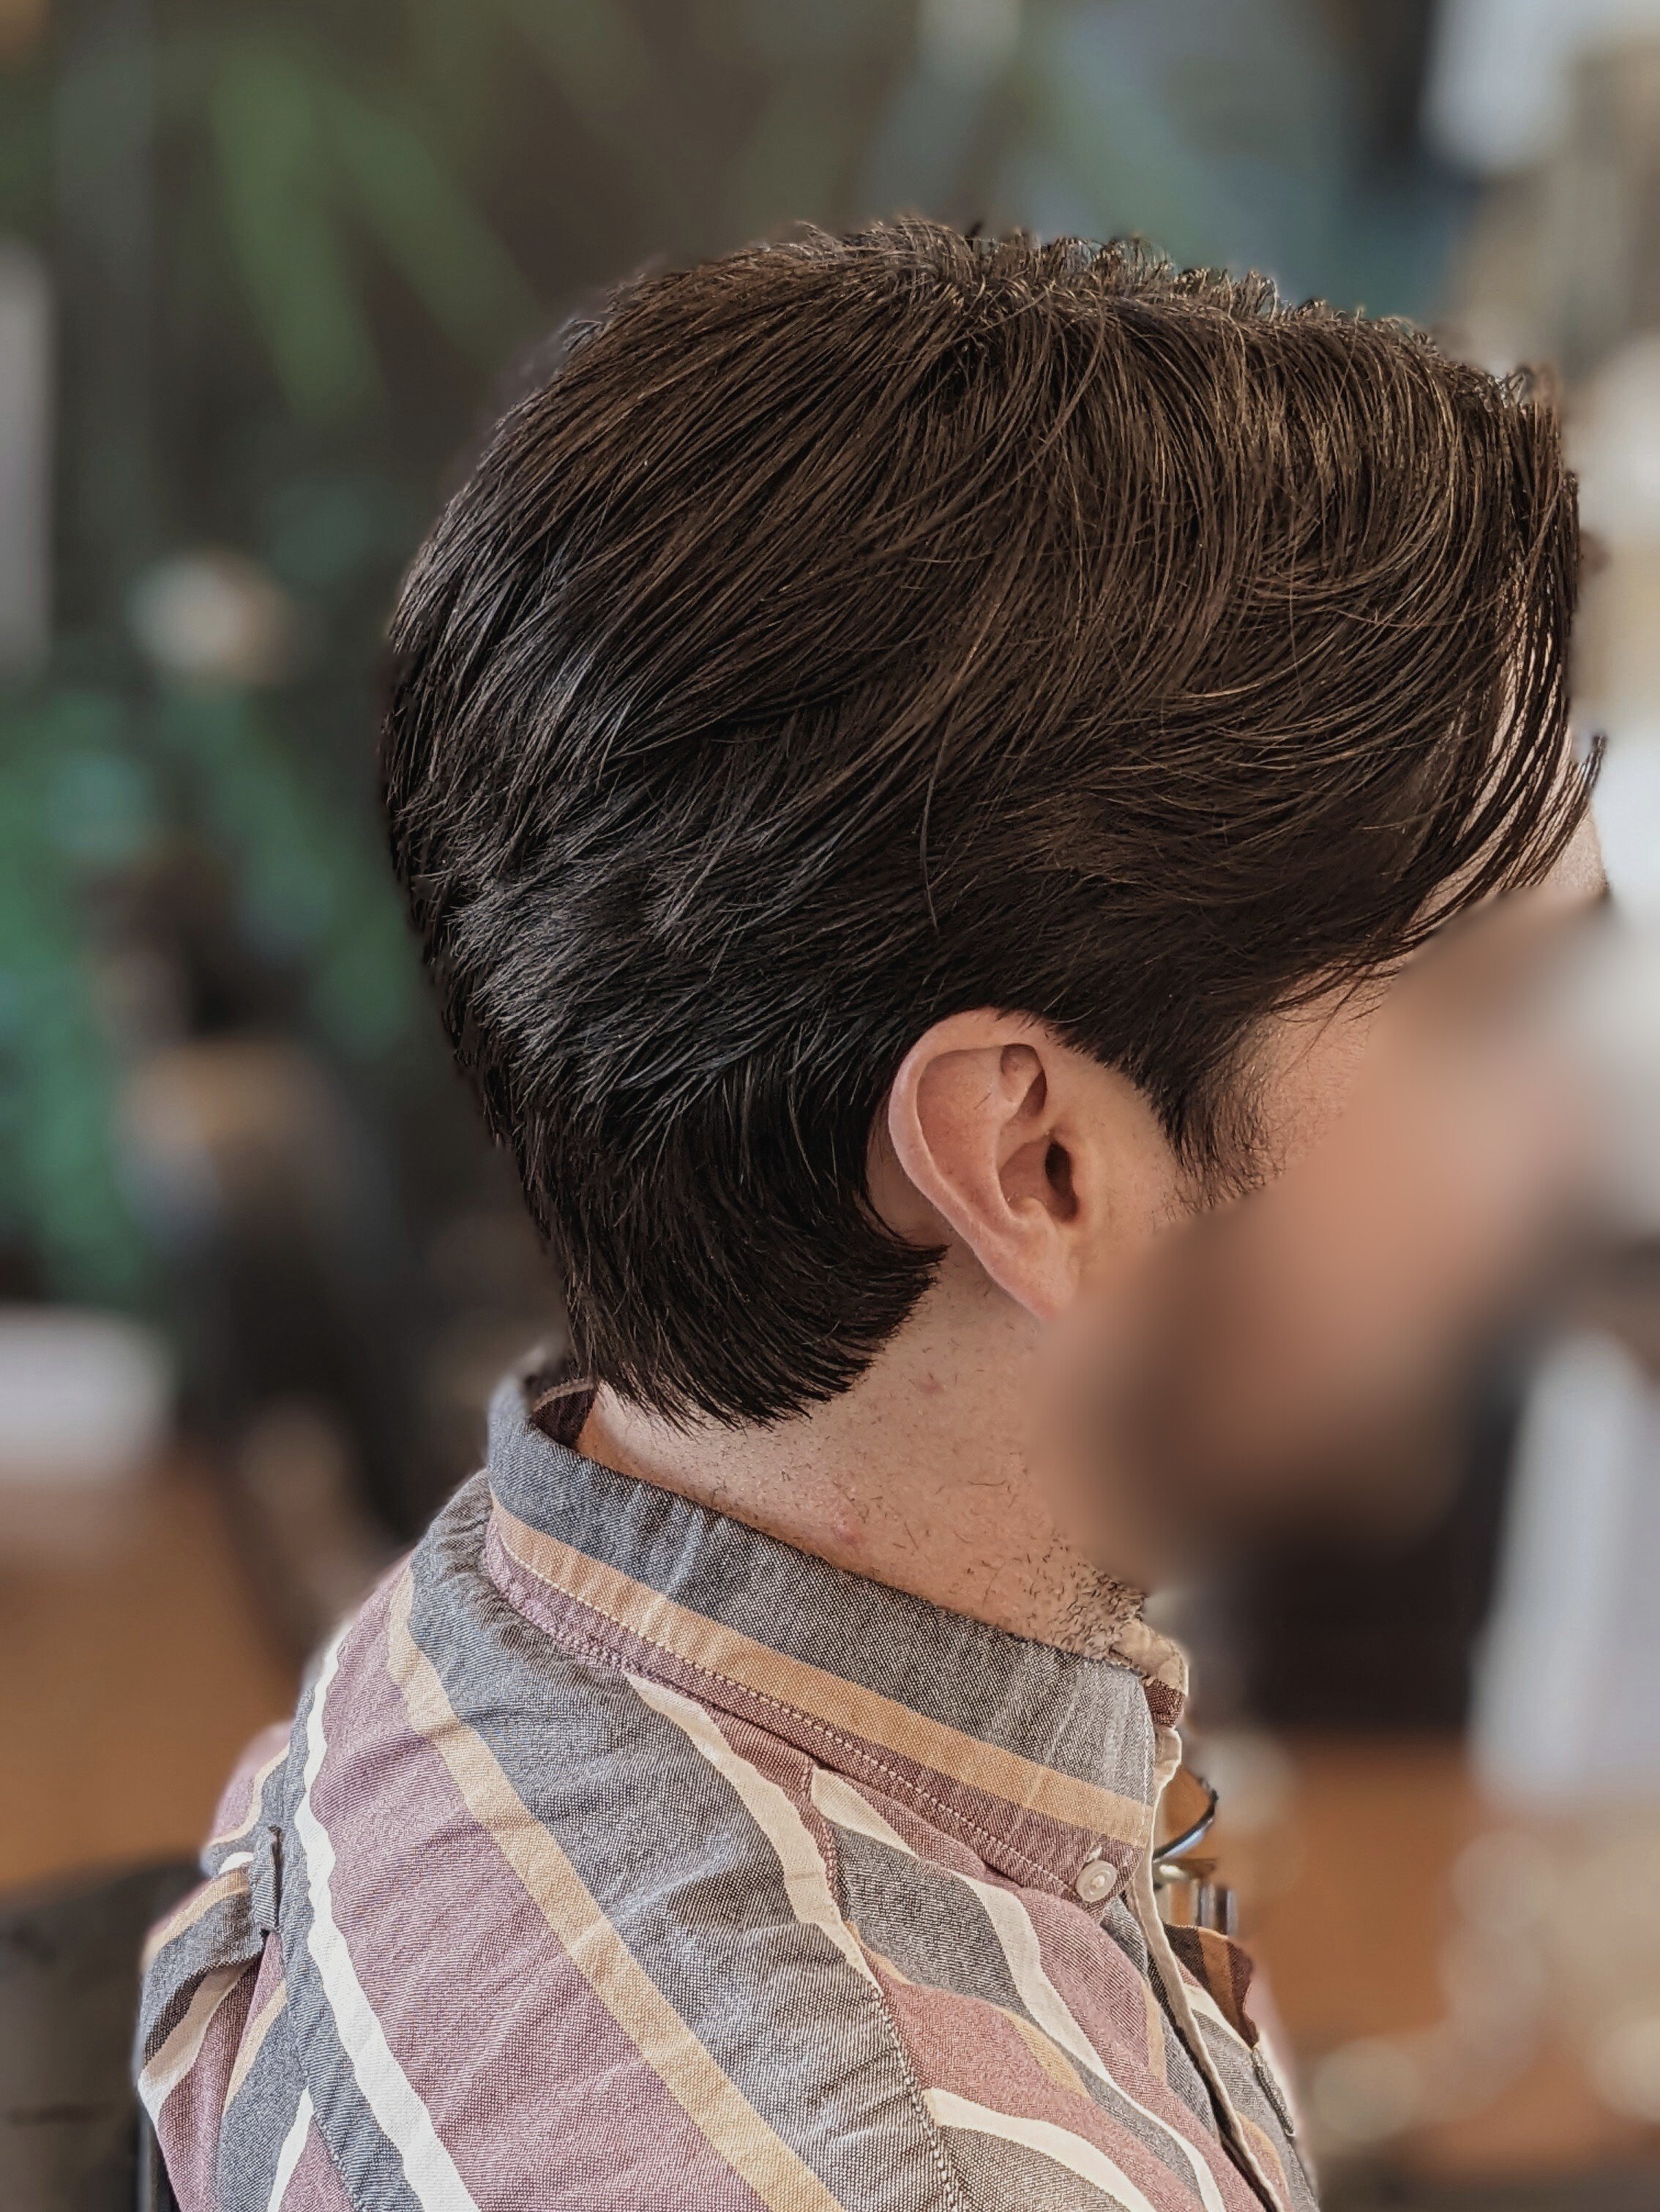
In terms of the sides and back, you have so much freedom in how short you want to have them. It really is up to you! This style can be done with a fade, or with medium-length hair. With a fade, the hairstyle will come off edgier, while longer sides will potentially make you look like Jesus.
You could even combine the middle part with a mullet where your back is left long, and the sides are kept short. For my own personal preference, I think something closer to the featured image works best as the sides are not super short which allows for flow and texture to be shown. If you do go for really short sides, then you may want to consider disconnecting the sides from the top so that more length can be maintained for styling.
Unlike most other haircuts I have gone over where the majority of people can probably pull them off, there are going to be some that the middle part will just not suit. And I'm not talking about which generation you may have grown up in, just purely the aesthetic itself!
Since the middle part is a very symmetrical look, it will bring to attention any asymmetry in your face or head. This especially impacts anyone with a cowlick on their front hairline, where the hair wants to grow a certain way, or anyone with a widow's peak (such as myself). You can still try to wear this style, but it will require much more effort to blow dry both sides of the parting to be even. You may find that one side sticks up higher than the other, or that your hair simply does not want to part right in the middle. It can be really frustrating and time-consuming to try to work with it, as your hair's natural growth will always affect the end result.
If you want a similar look but have these issues with your hair growth pattern, then you may want to consider not doing a strict middle part and opting for an off-center part instead. You will be close to the middle but will let your hair's natural growth determine where the parting should be and this will make styling much easier for you since you're no longer fighting against your hair.
You actually have multiple points where a natural parting will form on your head, and there is a simple trick where you comb back damp hair and gently push it a bit forward. By doing so, the hair will start to split more noticeably in different spots, and you can choose a parting that is natural to you from those reference points.
Like any other haircut, strategically texturizing and thinning out the hair is crucial. You want the hair to feel light enough so that it can still get a good amount of volume and flow slightly backward. Anything too heavy will just sit like a bowl on your head, and you may find it very hard to style in the morning. I usually use a texture razor as my main tool for removing bulk as I can pick and choose places of high density more precisely.
Another technique that can be used would be slide cutting, where a stylist will glide their scissors across the surface of your hair, while subtly closing the blade (not all the way). This technique is great for promoting certain directional movements in your hair, which will make it easier to style in that specific direction.
How to Style
Once you commit to a haircut that can be styled into a middle part, you should have an easy time styling as it is as simple as finding that exact same part every time. From that point forward, you will want to blow-dry the hair as this will help create volume, and you especially want to make sure the front of your hair has that volume.
I'd recommend that you start blow-drying right on the part, as this will solidify that defined line as the hair dries. From there, you'll want to pick one side to work on first. Blow dry the back section towards the back, and as you work toward the front, you will want to start using a brush to lift the hair more and more upwards as this will start to build volume.
With your fingers, you may want to pinch the hair and bend it so that it flicks away from your face. Once you're happy with the height and texture, you can repeat the same steps on the second side to match.
Again, this is a style that is made to be symmetrical, so it can really help to finish one side first and then focus on making the other side reflect it as opposed to trying to style both sides at the same time and overworking the hair trying to make it balanced.
After you are done with blow drying, then you will want to add a bit of product to ensure everything stays in place out of your face. I’d recommend applying a medium-hold styling cream, which will give a soft yet firm finish to the hair so that it can still have some movement throughout the day. Some products I recommend for this kind of style include:

Thank you for reading!
My name is Wesley, I am a Barber located in the city of Calgary helping my clients become more confident with all things related to their hair by providing customized haircuts that suit them best while demystifying all the complicated hair information out there!